프린터를 박스에서 꺼냅니다.
Remove the printer from the box.
프린터 전원은 켜지 마세요.
Do not turn on the printer.
잉크공급기를 박스에서 꺼냅니다.
Remove the CISS from the box.
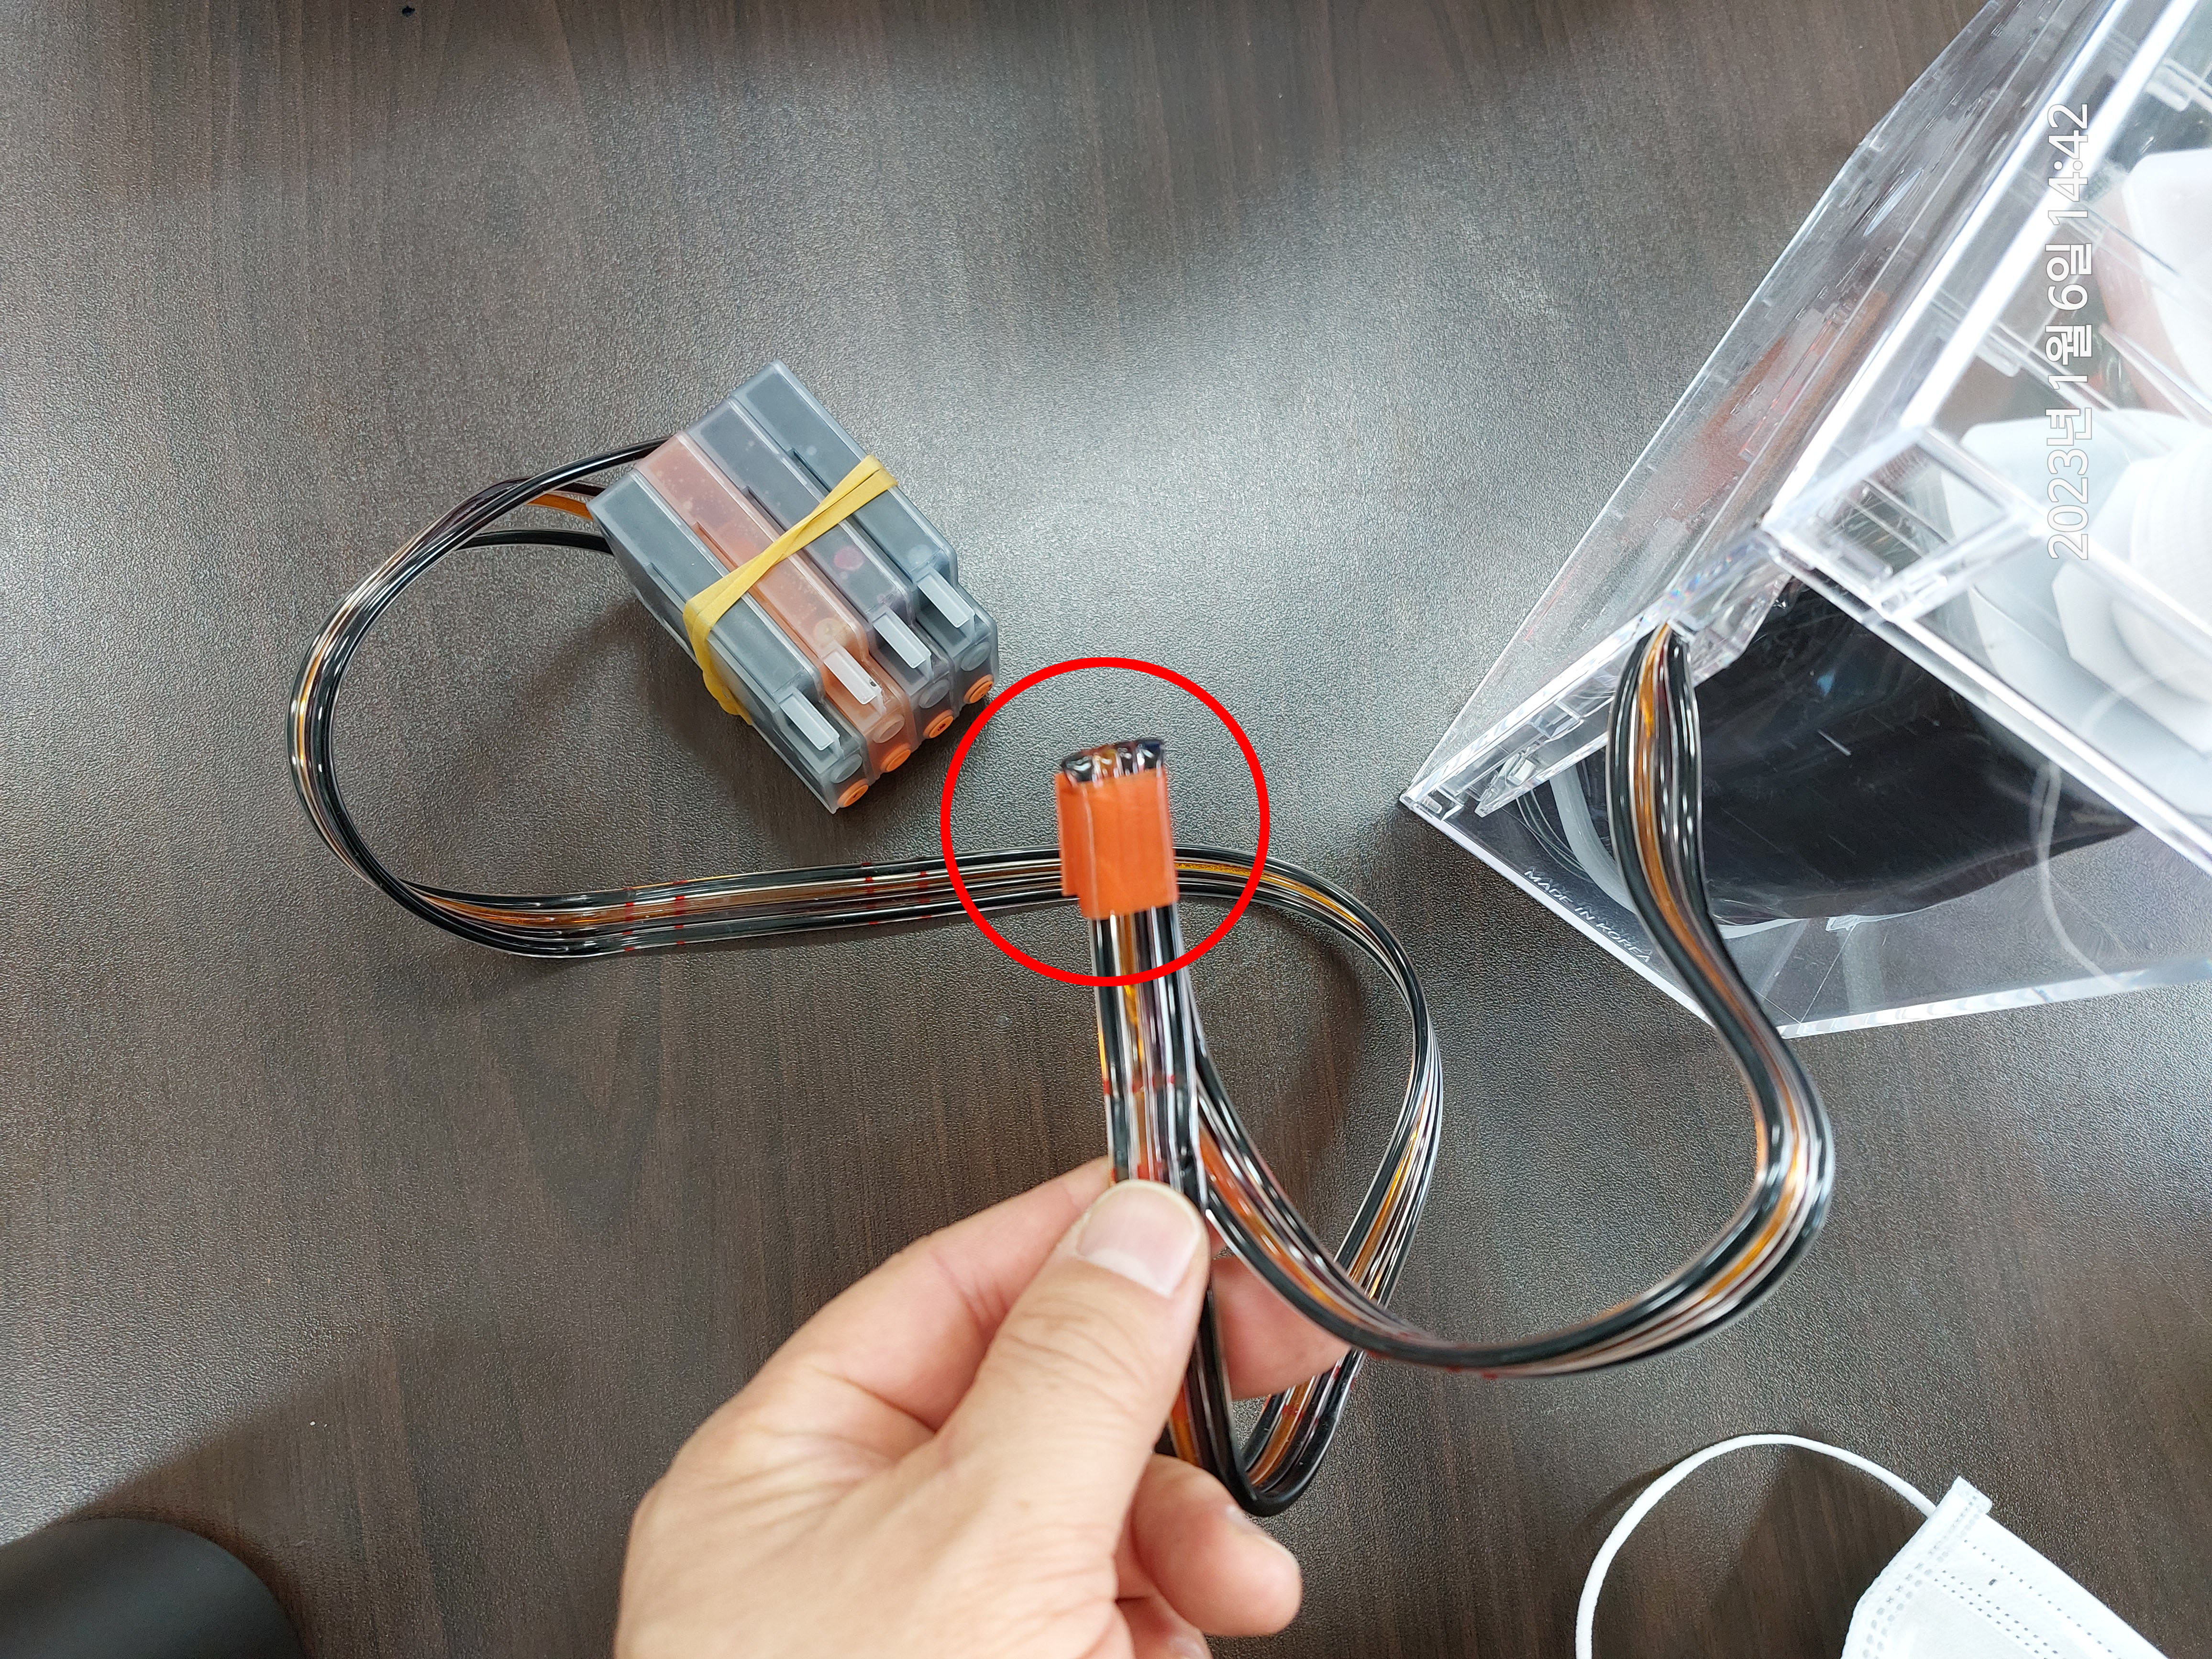
잉크호스 중간의 테이프를 제거하세요.
Remove the tape in the middle of the ink hose.
잉크탱크는 프린터 우측에 사진처럼 위치시킵니다.
Place the ink tank on the right side of the printer as shown in the picture.
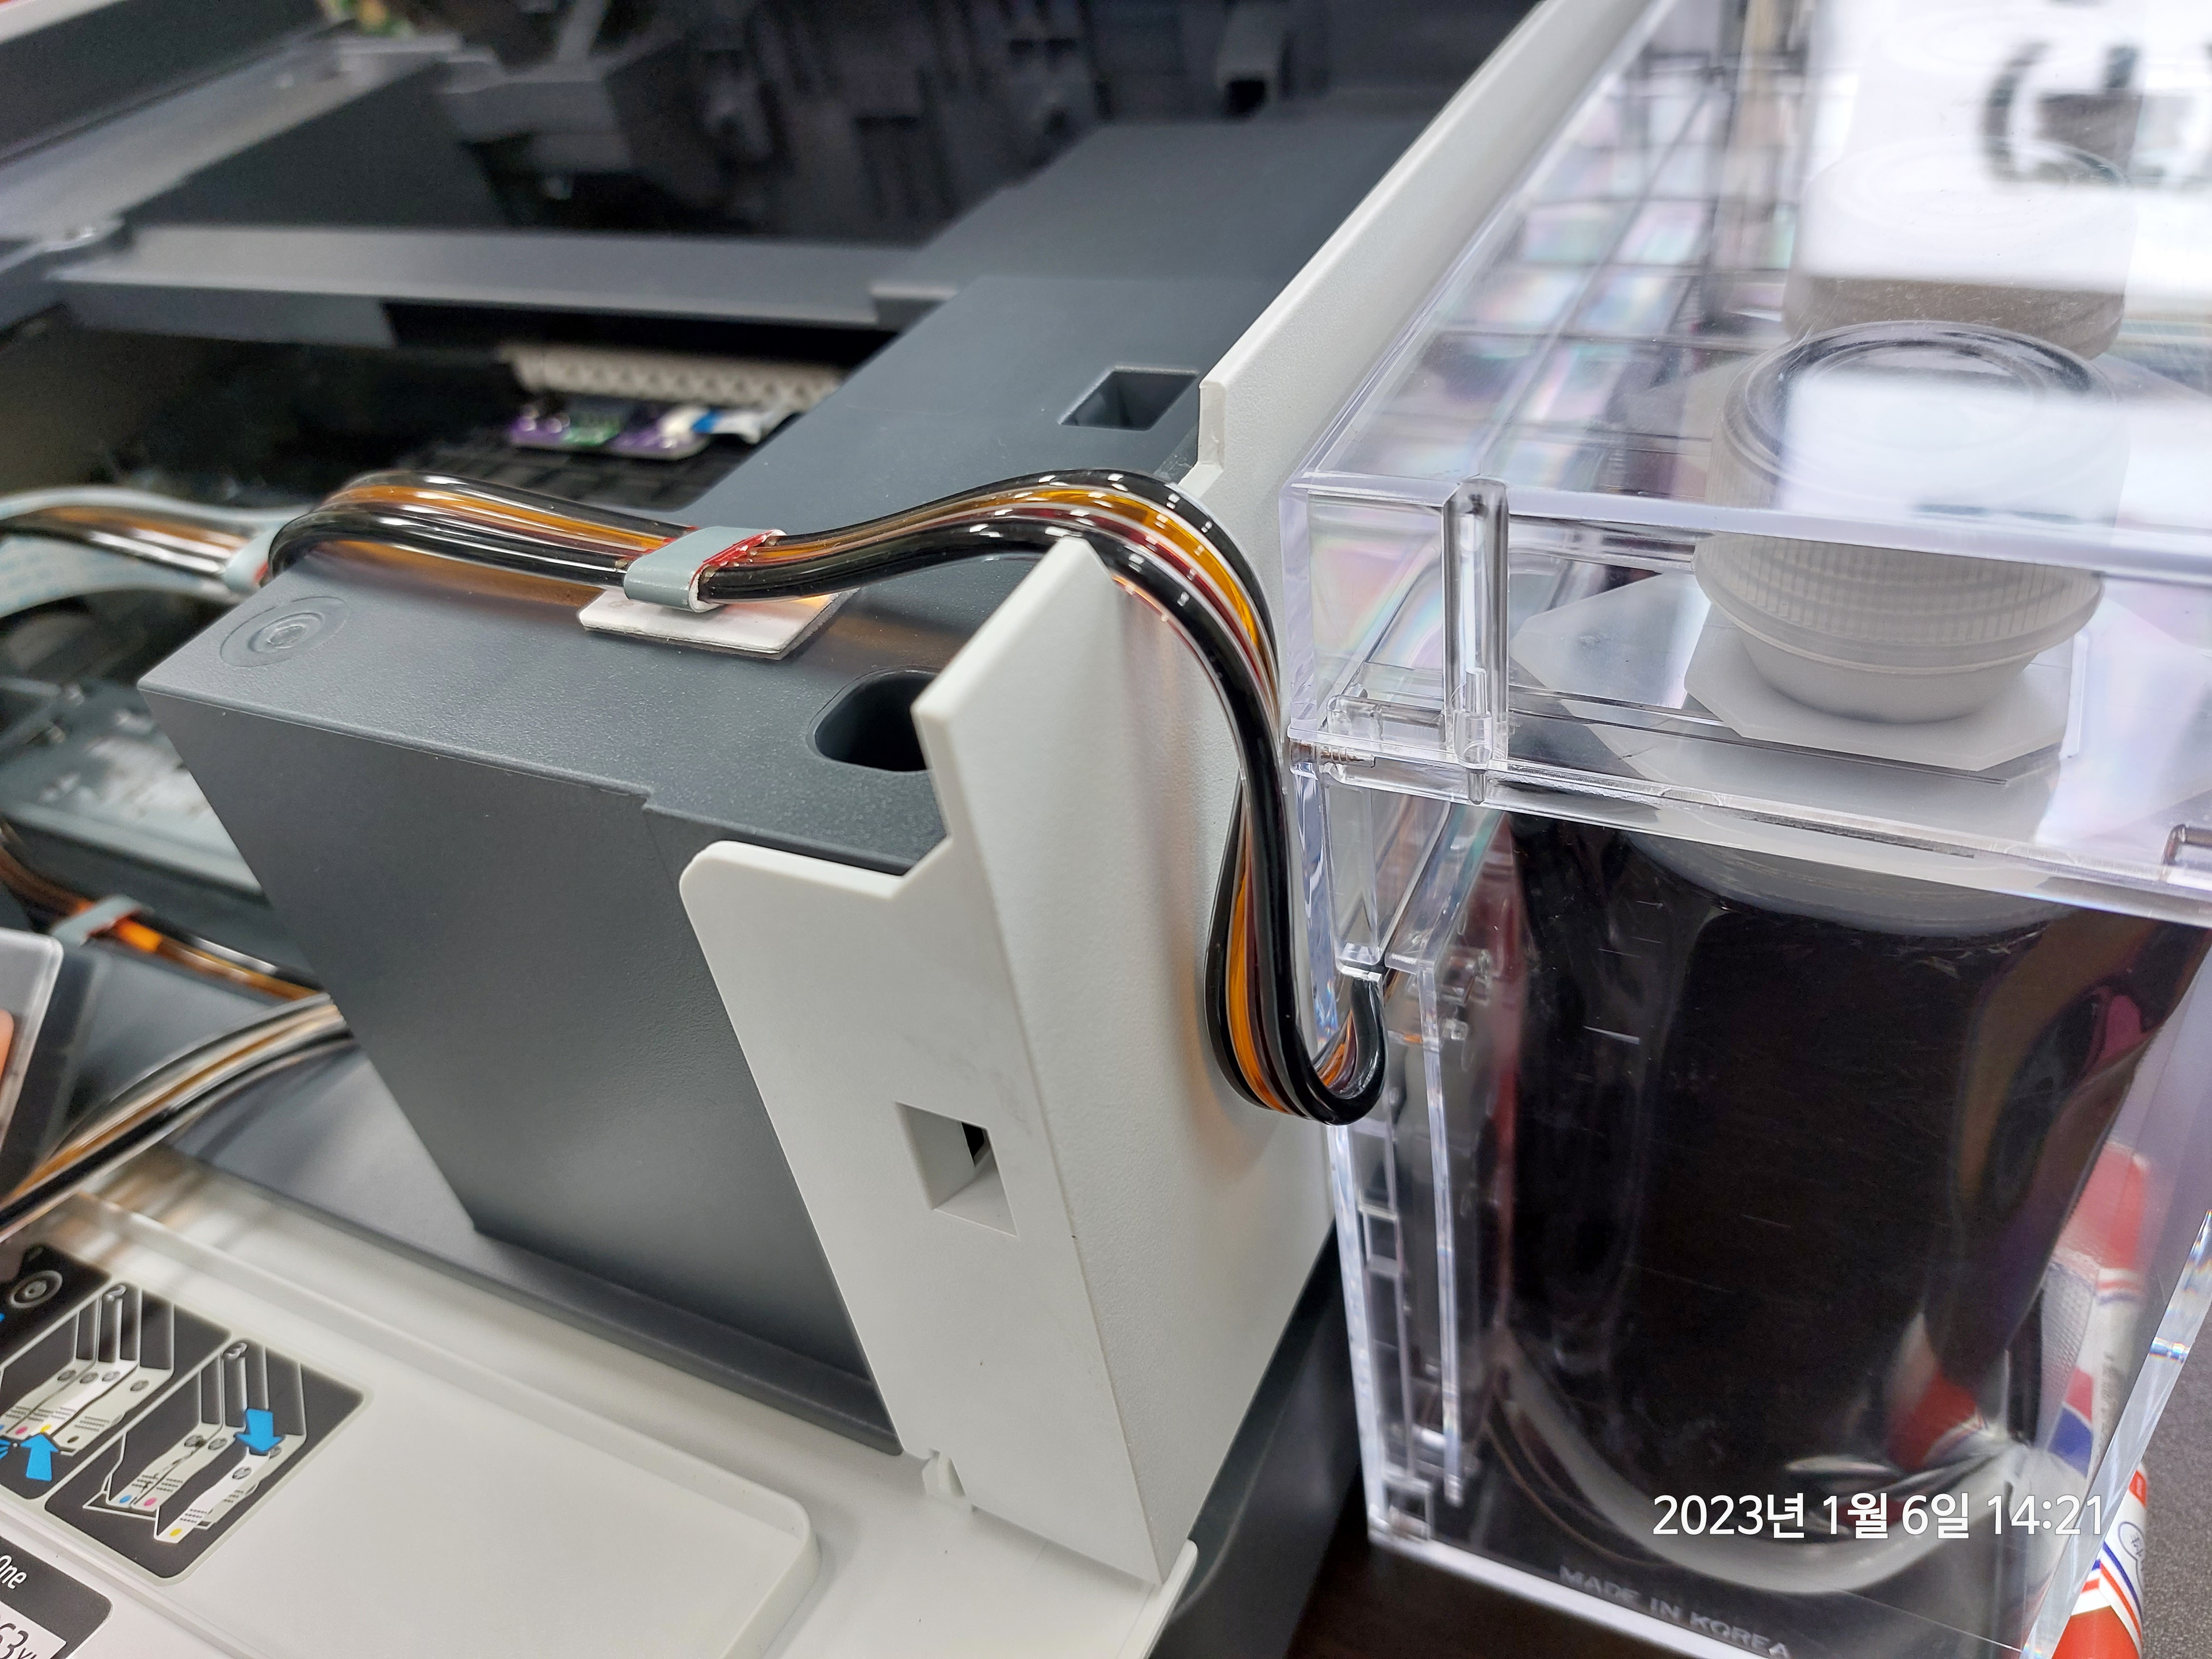
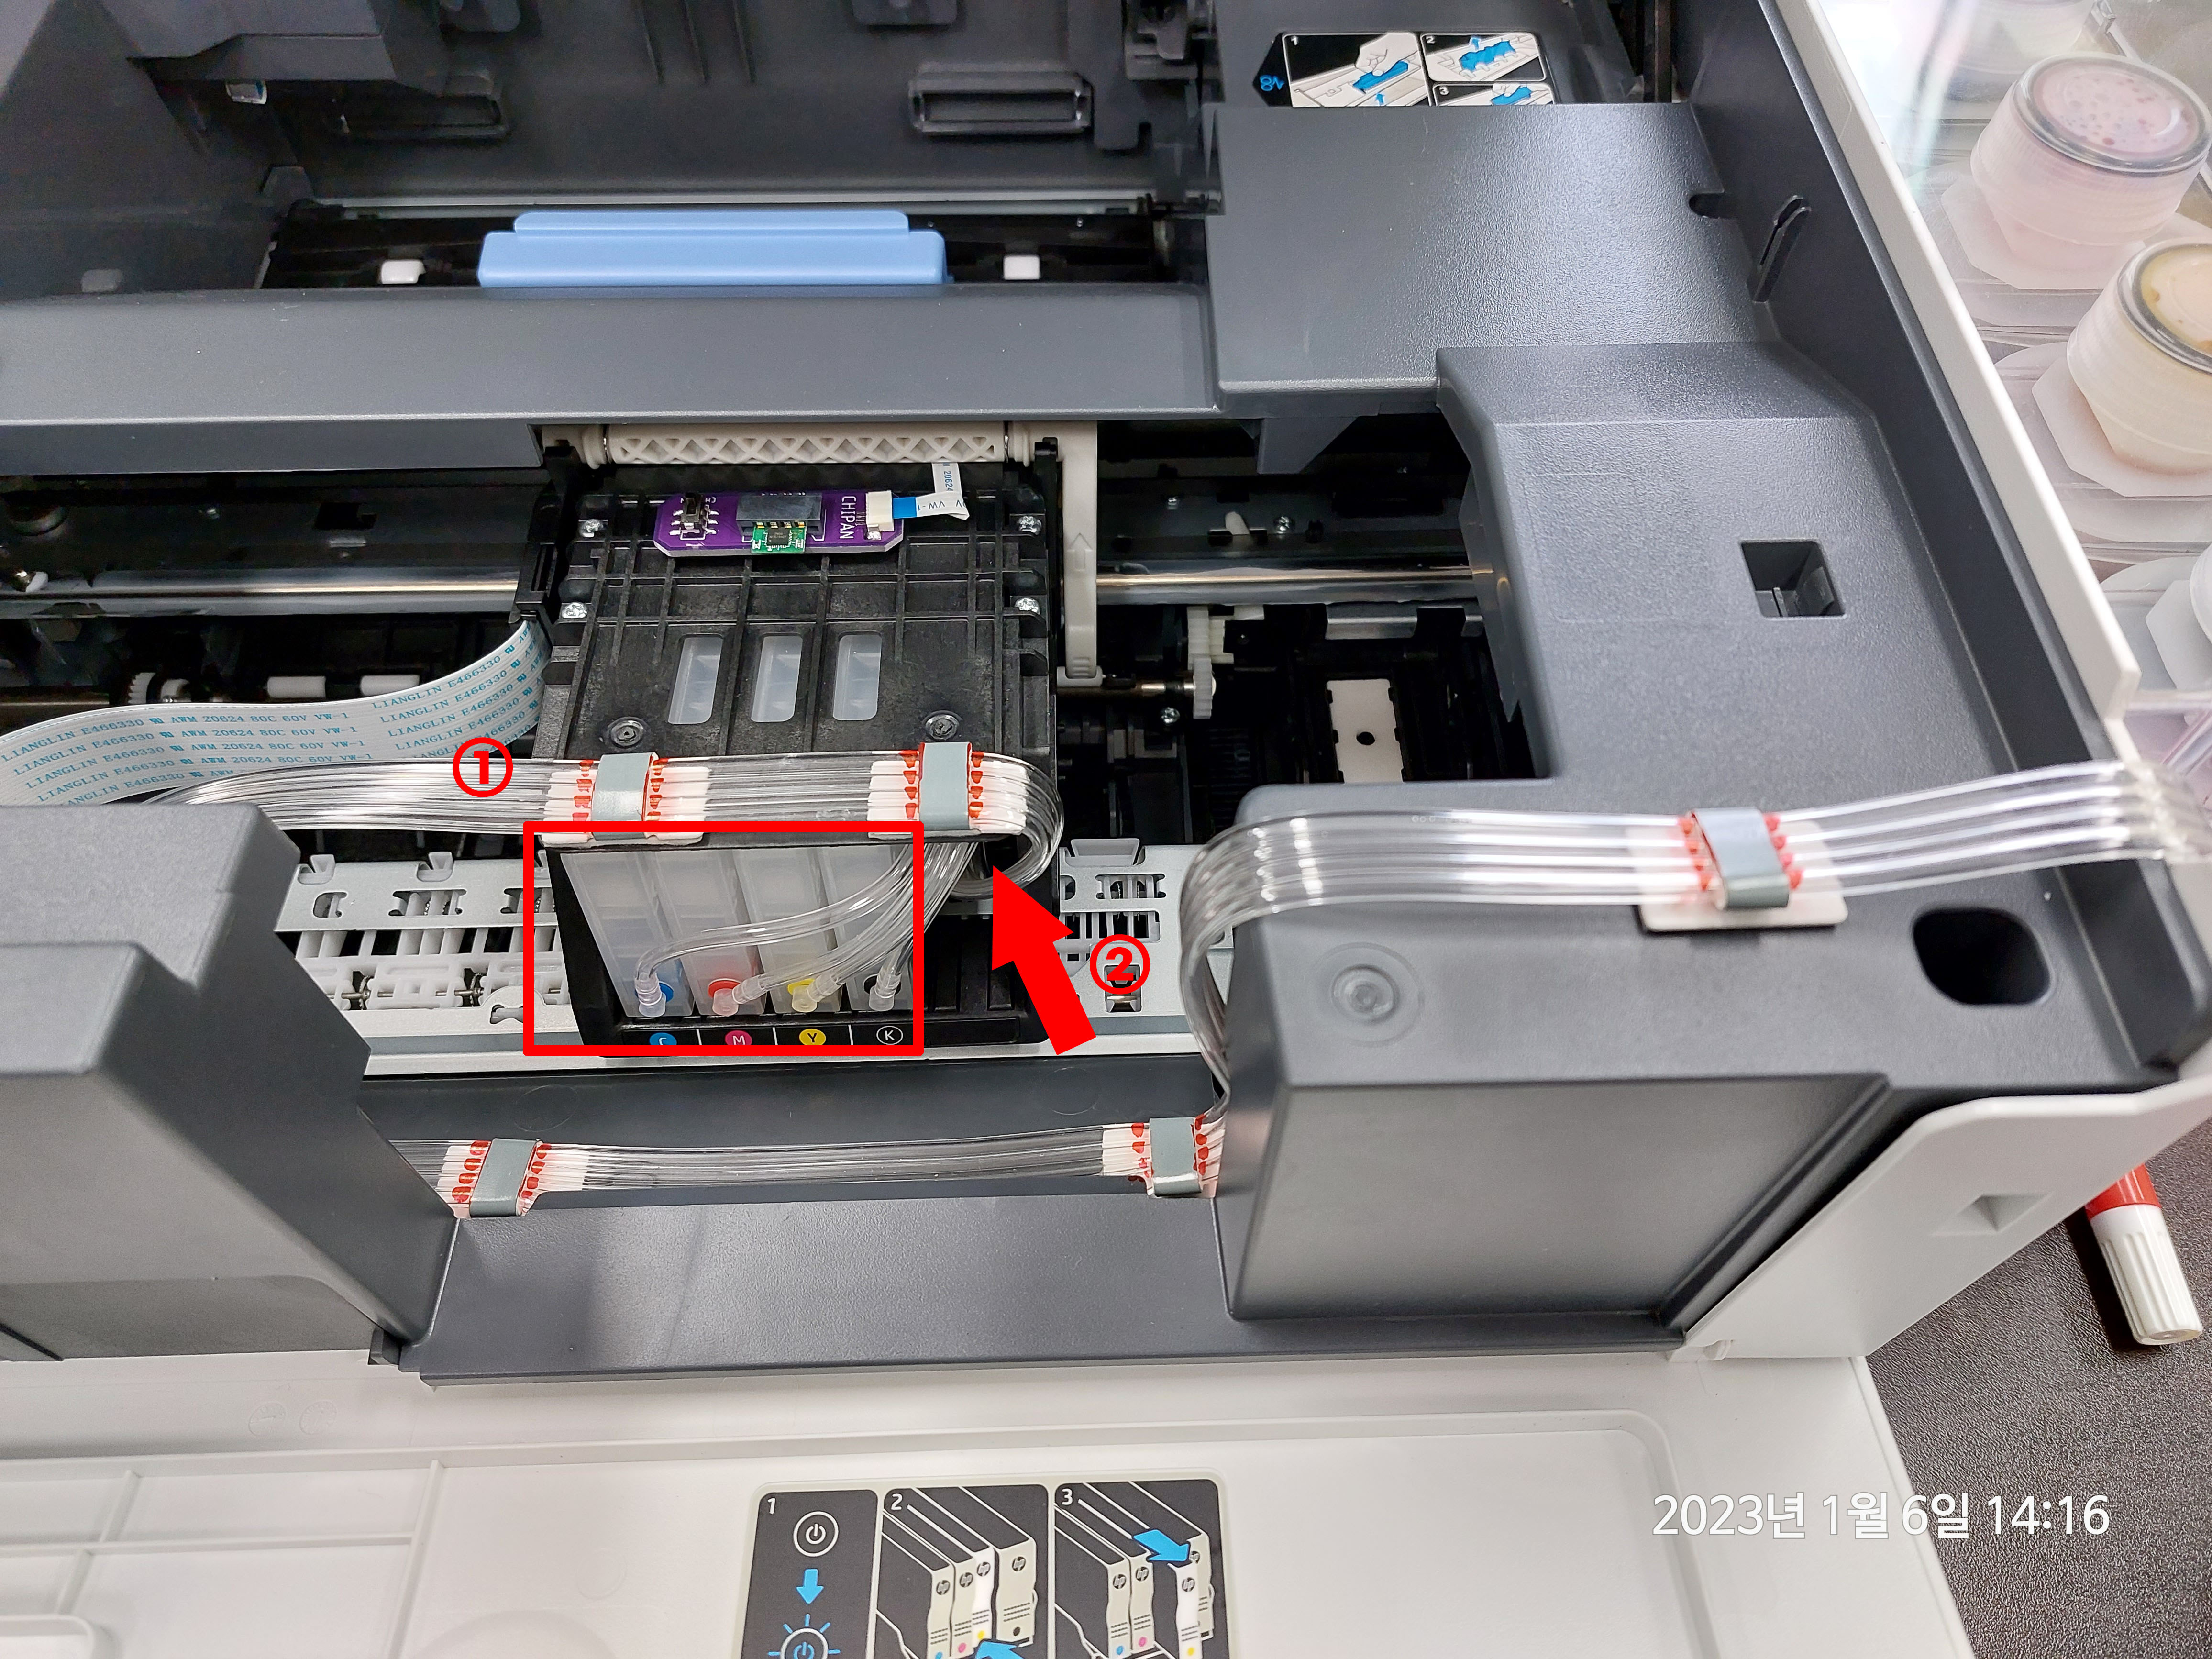
대단히 중요한 부분입니다.
잉크호스에 붉은색으로 마킹된 부분을 클램프에 맞춰 고정하세요.
(카트리지는 끼우지 마세요.)
It's a very important part.
Fix the part marked red on the ink hose with the clamp.
(Do not insert the cartridges)
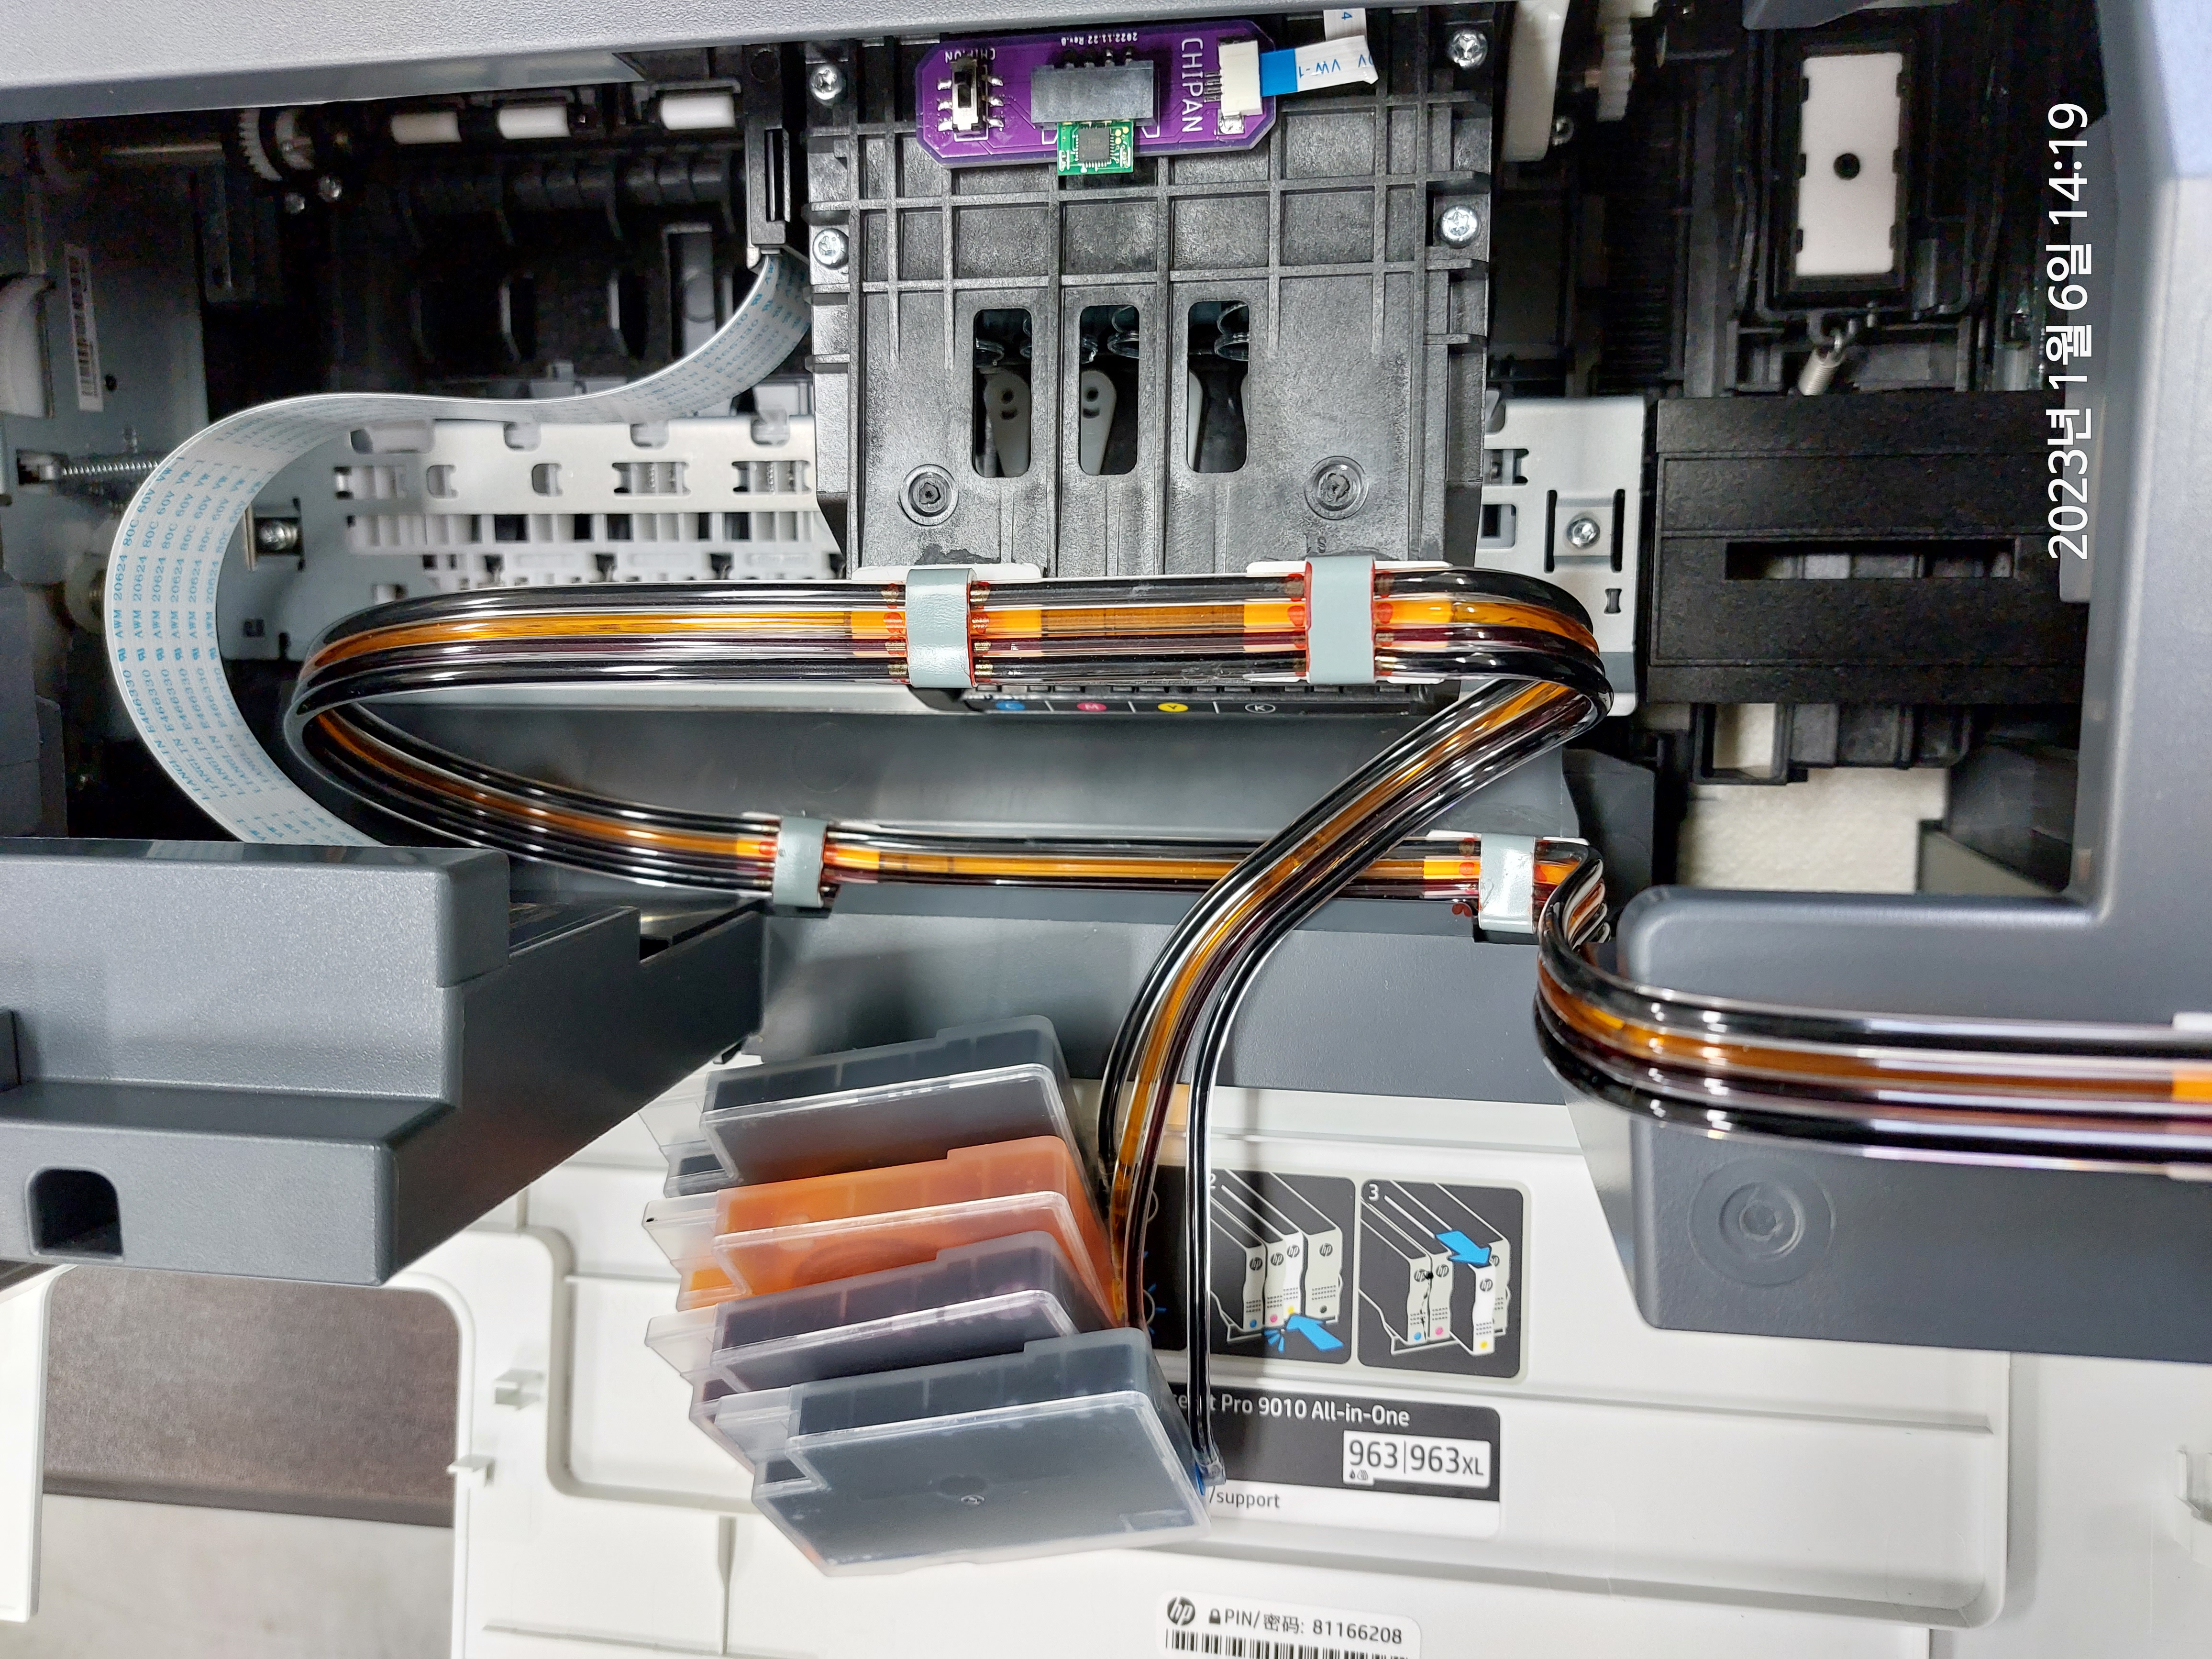
잉크호스가 어떻게 비틀어진채 고정되는지 보세요.
Look at how the ink hose is twisted and secured.
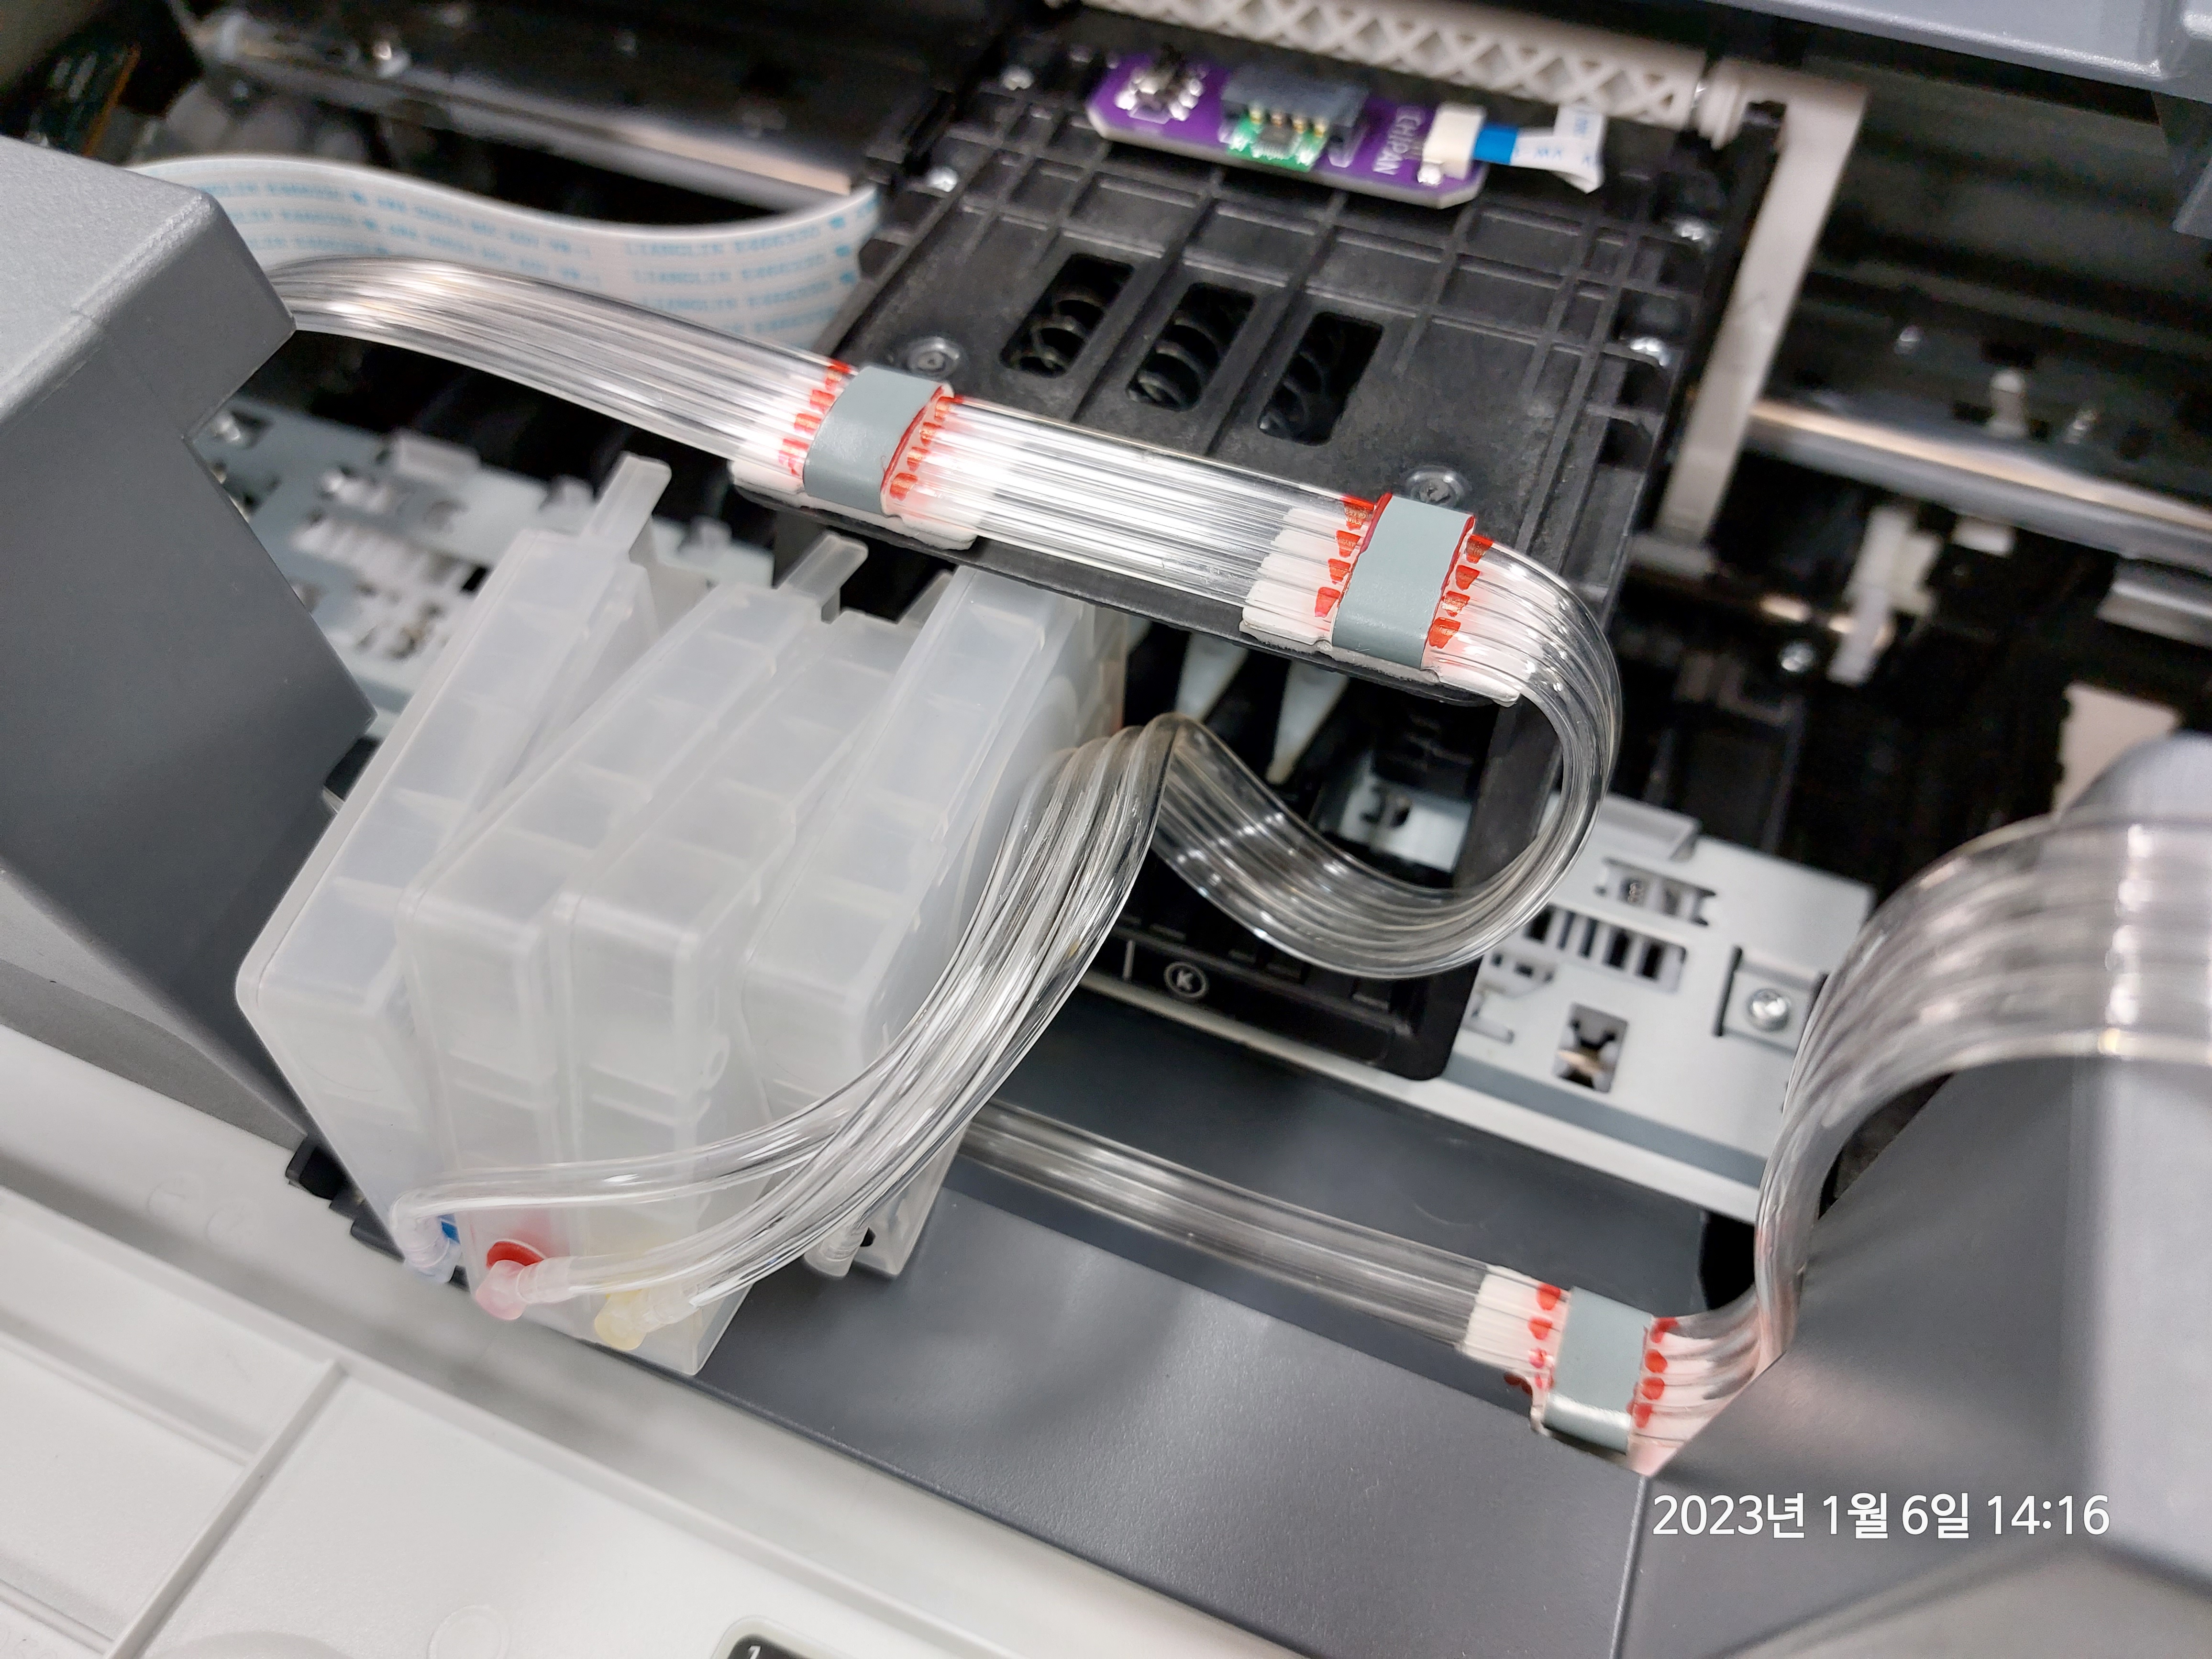
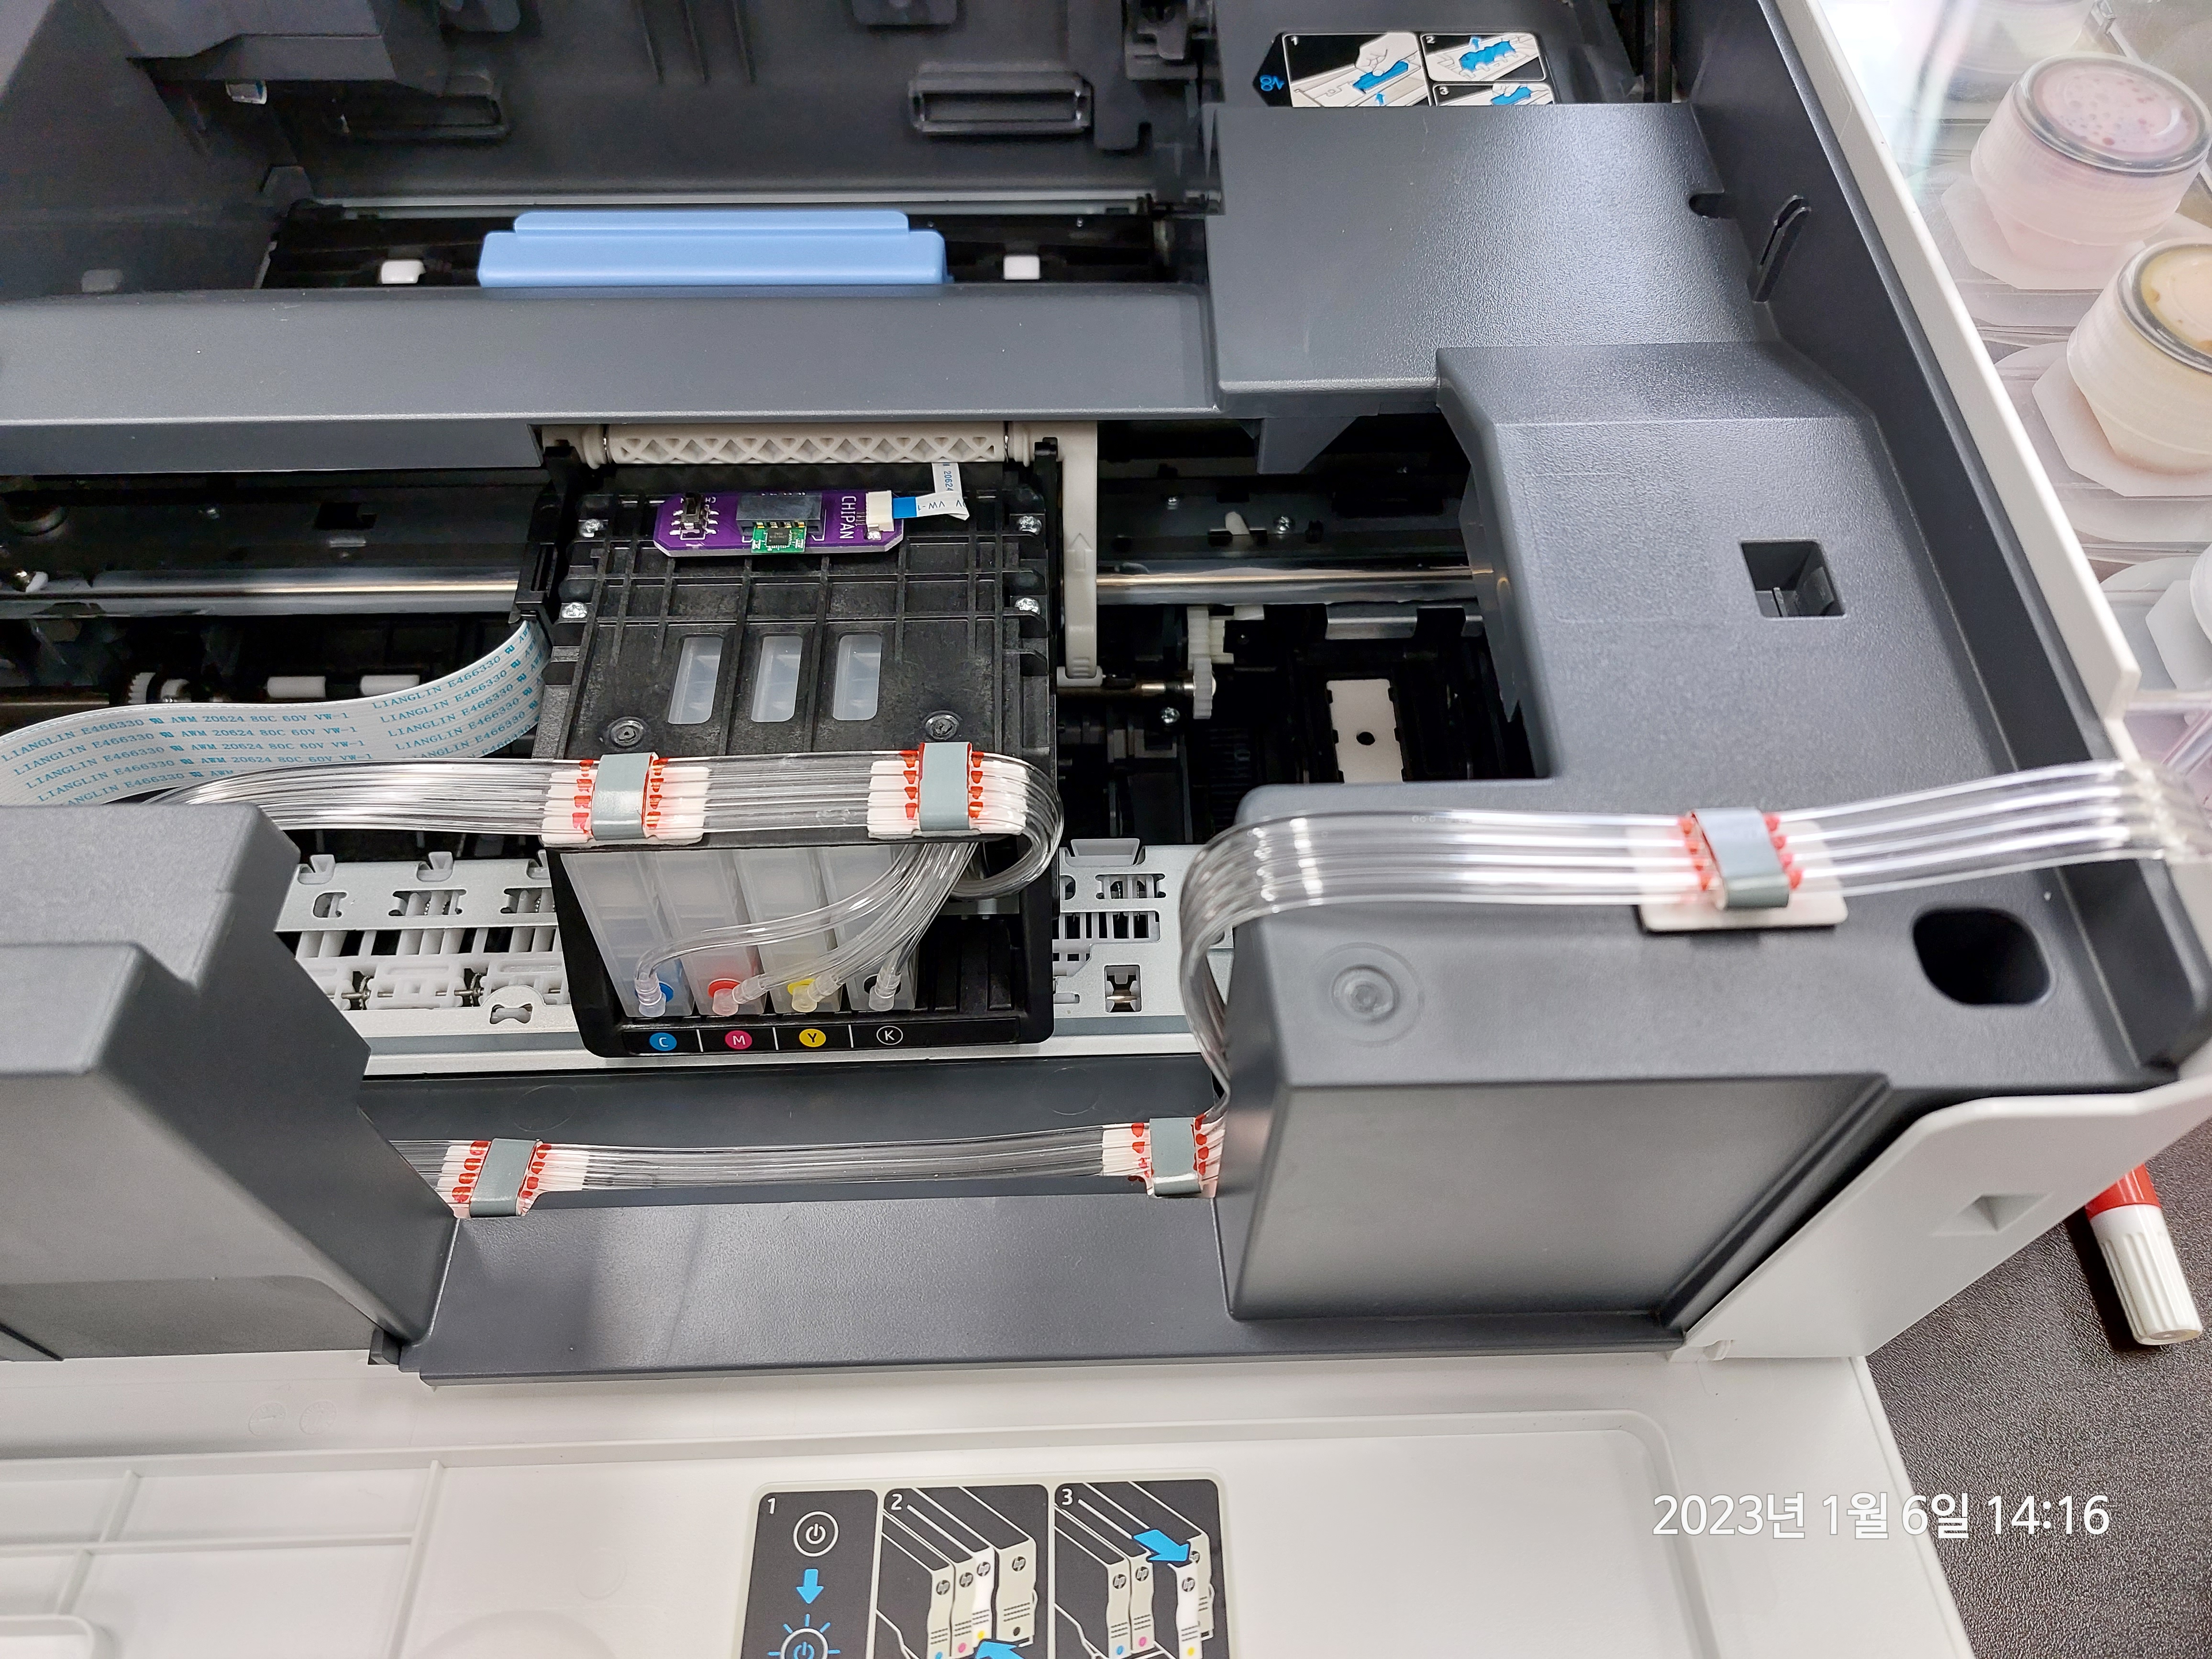
아래 사진이 잉크호스의 적절한 배치상태입니다.
이 사진을 참고로 하여 최대한 동일한 형태를 만드세요.
The picture below shows the proper placement of the ink hose.
Use this picture as a reference to make the same shape as possible.
STEP ①
아래 사진과 같이, 프린터 헤드에 잉크 카트리지를 삽입합니다.
색상 순서는 좌측부터 C,M,Y 그리고 K순서입니다
카트리지를 헤드 깊숙히 밀어 넣으면 딸깍 ! 하고 락이 걸리는 소리가 나며 밖으로 나오지 않게 됩니다.
만약, 카트리지가 밖으로 밀려 나온다면 끝까지 밀어 넣어 주세요.
카트리지를 헤드에서 분리할 때는, 다시 밀어 넣으면 락이 풀리고 빠지게 됩니다..
Insert the ink cartridge into the printer head, as shown in the picture below.
The order of colors is C, M, Y, and K from the left.
If you push the cartridge deep into the head, it will make a clicking sound and prevent it from coming out.
If the cartridge is pushed out, push it all the way in.
When removing the cartridge from the head, push it back in to release and release the lock.
STEP ②
잉크호스는 화살표가 가리키는 틈에 밀어 넣어 줍니다.
The ink hose is pushed into the gap indicated by the arrow.
이제 마지막 단계입니다.
프린터 헤드를 좌측 끝으로 이동시켜 보세요.
다시 오른쪽 끝까지 이동해 보세요.
잉크호스가 걸리면 잘못 설치한 것입니다..
This is the last step.
Try moving the printer head to the left end.
Move back to the far right.
If the ink hose is caught, it is installed incorrectly.
확인이 끝났다면 프린터 전원을 켜고 셋업을 시작하십시요.
행운을 빕니다. :)
When you are finished, turn on the printer and start setup.
I wish you the best of luck. :)
아, 한가지 더 !
프린터 헤드위의 작은 PCB는 프린터에 잉크 칩을 연결하는 PCB입니다..
프린터 셋업을 할 때는 스위치 방향은 CHIP.ON 을 향해야 합니다..
셋업이 끝난 다음에는 OFF로 이동을 해도 됩니다..
Oh, one more thing!
A small PCB on the printer head is a PCB that connects ink chip to the printer.
When setting up the printer, the switch direction should be CHIP.ON.
After setup, you can go to OFF.


